
Photographs are a valuable way to bring history to life for students. Seeing exact reproductions of faces and places from the past can deepen students’ sense of what life may have been like in times past. This supports what Michael Hill refers to as ‘world building’: students’ ability to develop sufficient contextual knowledge and understanding to effectively imagine and inhabit the historical ‘worlds’ that they study. We can see photographic sources can be a very valuable tool in fostering this deep level of historical understanding.
It is important, however, that students also treat photographs with caution and a critical eye. Too often young learners have a tendency to assume that photographs taken before the advent of PhotoShop and generative AI provide complete and true representations of the past. Creating opportunities for them to question these assumptions and to critically examine photographs as sources is therefore essential for the development of their historical thinking.
Keep reading for ideas on where to find photographic sources, some short activities to easily incorporate photographs into your lessons, as well as ideas for more in-depth activities to promote students’ historical thinking about photographs as sources.
Where to find photographic sources
Of course, a simple Google-search will result in a wide number of photographs and other images. However, the provenance of these images may be difficult to trace. Other options may be preferable for this reason. For example, teachers looking for historical photographs can find a wealth of options on Europeana, including thematic collections on topics such as Industrial Heritage, Sport, Migration, World War I, Making Culture and many others. You can also simply search their database and filter for images to locate sources relevant to the topics within your own curriculum.
The Historiana Historical Content team has used many of Europeana’s vast resources, alongside others, to create source collections curated specifically for use in the history classroom. One key advantage of these collections is that each image is accompanied by a text that places it in its historical context which can be very useful for teachers and students alike. These source collections include:
- People at Work (Industrial Revolutions)
- Life in Europe in the 1950s
- Colonial Contributions to WWI
- The Visual Front (WWI Official Photographs)
- European emigration to the USA in the late 19th Century
- Suffragettes in the United Kingdom
Short Activities Using Photographs
There are a range of short activities you can integrate into your lessons to support students to engage with photographs as historical sources. These make greater ‘starter’ activities, for example, to prompt student thinking at the beginning of a lesson. Harvard Graduate School of Education’s Visible Thinking Routines for Art, Images and Objects form an excellent inventory of ideas that can be adapted to have a greater focus on history. Some examples of these include:
1. See, Think, Wonder
This thinking routine can work best when students are presented with a photograph representing a period or event with which they are unfamiliar. It can promote curiosity for the topic and support them to look for specific details and initiate interpretation of an image. This can be usefully carried out in discussion in small groups or pairs first before students share back to the whole class.
First, students identify as many details as they can which they see in the image. Here they should aim to avoid interpretation but simply state all that is visible.
Second, they begin interpretation by discussing what they think the image is showing. Here, they may begin to draw in their own prior knowledge or use reasoning based on the details they identified in the first stage.
Finally, students share what the image makes them wonder, i.e. the questions that it raises for them. Try to guide students to focus on historical questions as much as possible. These questions can form a useful point to return to later in the lesson.
2. What makes you say that?
Ask students a key question about the photograph you have provided. It can be quite general, such as “What is happening in this photograph?”, “Why do you think this photograph was taken?”, or “What do you think happened before this photograph was snapped?”.
As students offer their ideas, follow up their responses with the prompt: “What makes you say that?” This builds student skills in developing evidence-based responses by forcing them to point to specific details in the image to support their claims.
These short activities not only help students build skills in analysing photographs but can provide them with a solid basis on which to develop mental images of the world at that time. For this reason, photographs that give particular insights about people, places and material objects can be particularly helpful in ‘world building’ through this type of activity.
Longer Activities Using Photographs
Using longer activities can be helpful to further enhance students’ appreciation of the ways in which photographs form only partial and sometimes manipulated views into the past. Activities which encourage students to compare different photographs and to interrogate their purpose and construction in greater depth are particularly useful in this regard. You can see two examples of such activities below:
1. Jigsaw Activity Comparing Photographs of the Same Event
Divide students into small groups and assign each group one photograph of an event. For instance, in a lesson on reactions to the Vietnam War, I might assign students deliberately contrasting images from a protest rally at a Technical University in Germany from Europeana. The full gallery from the Europeana website can be found here.
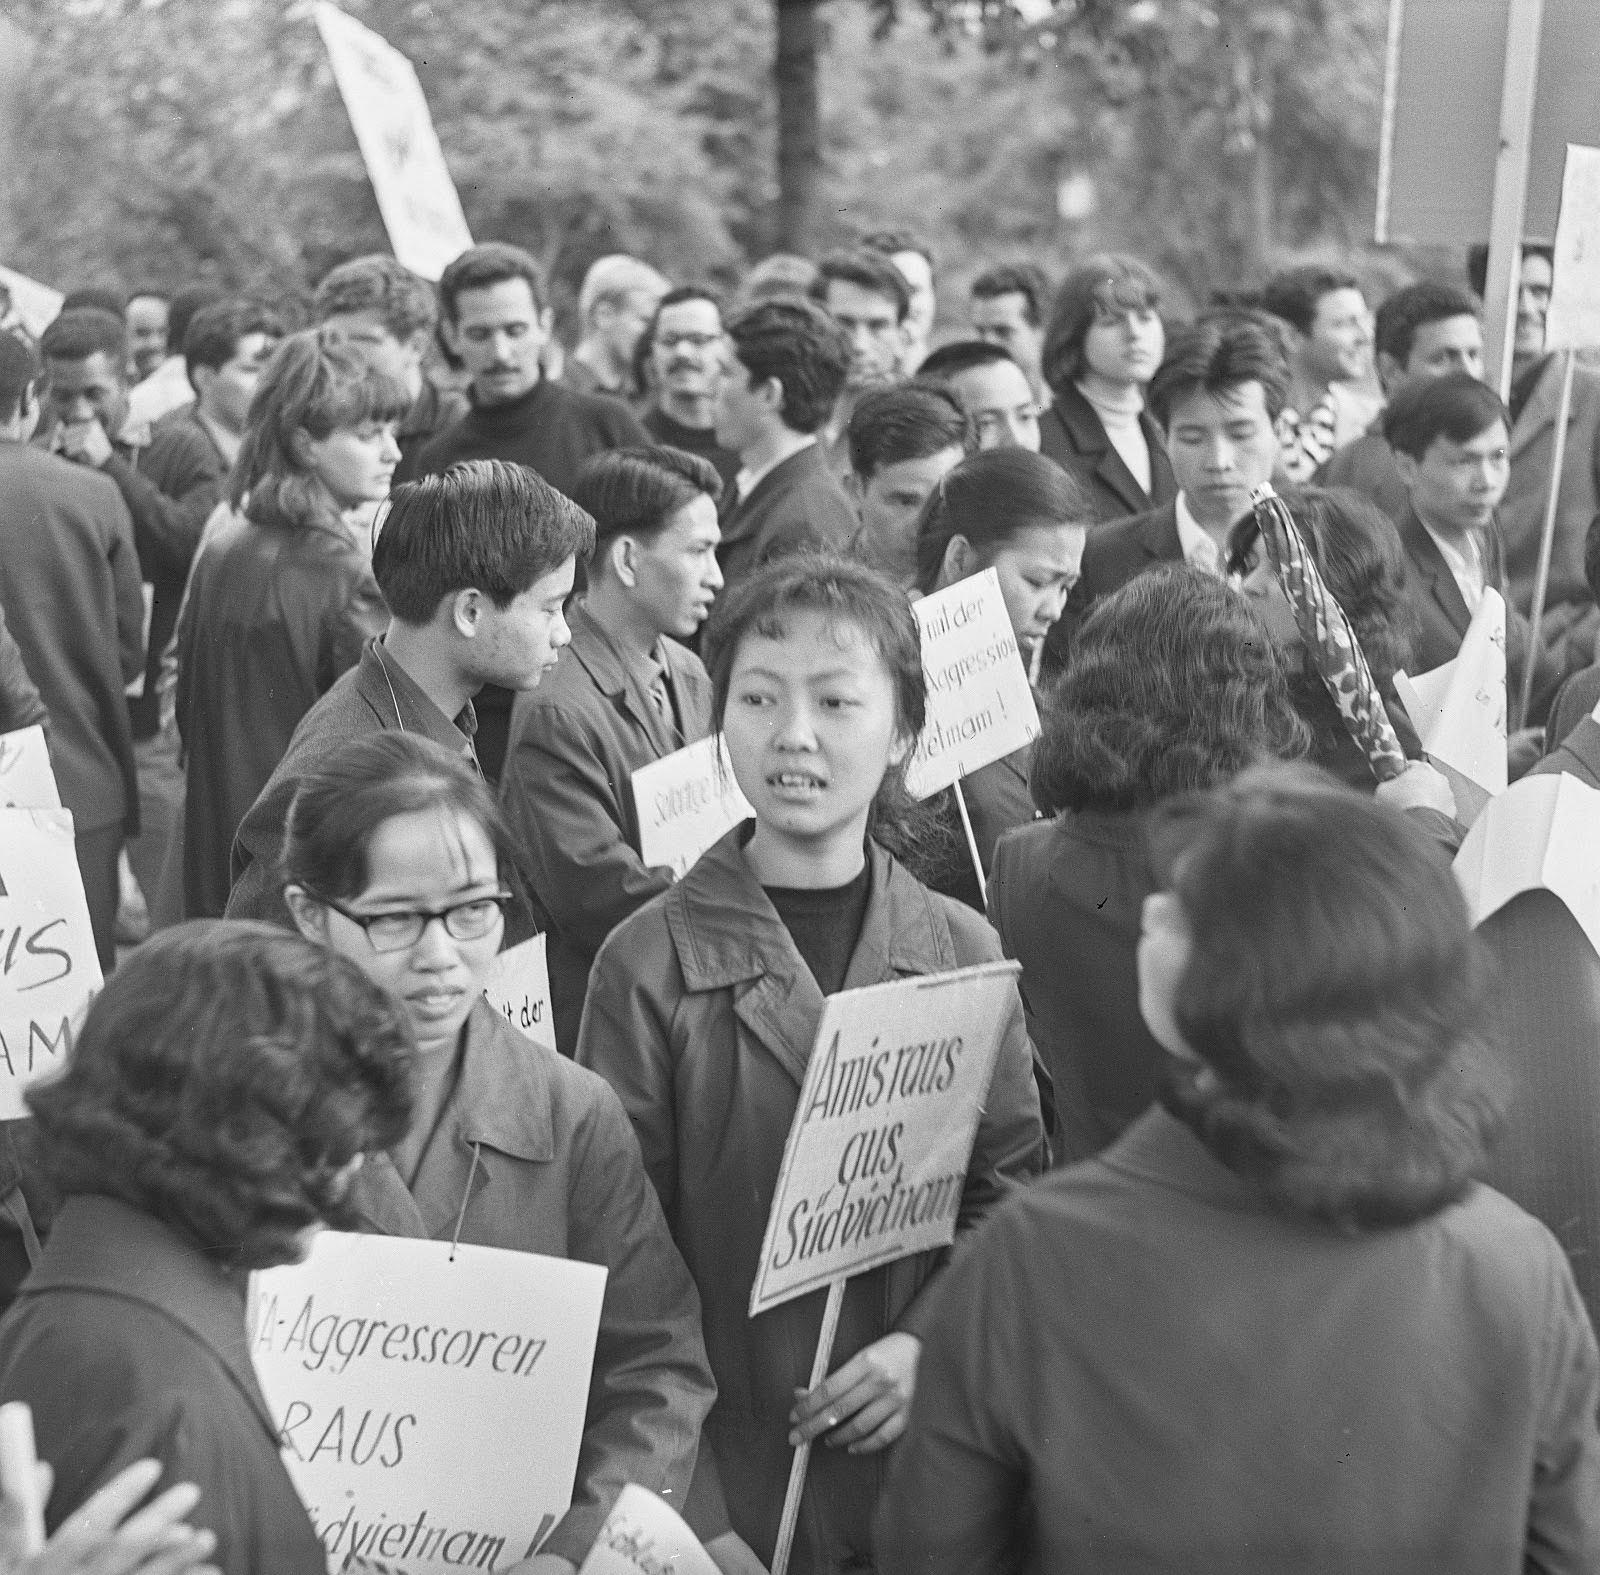
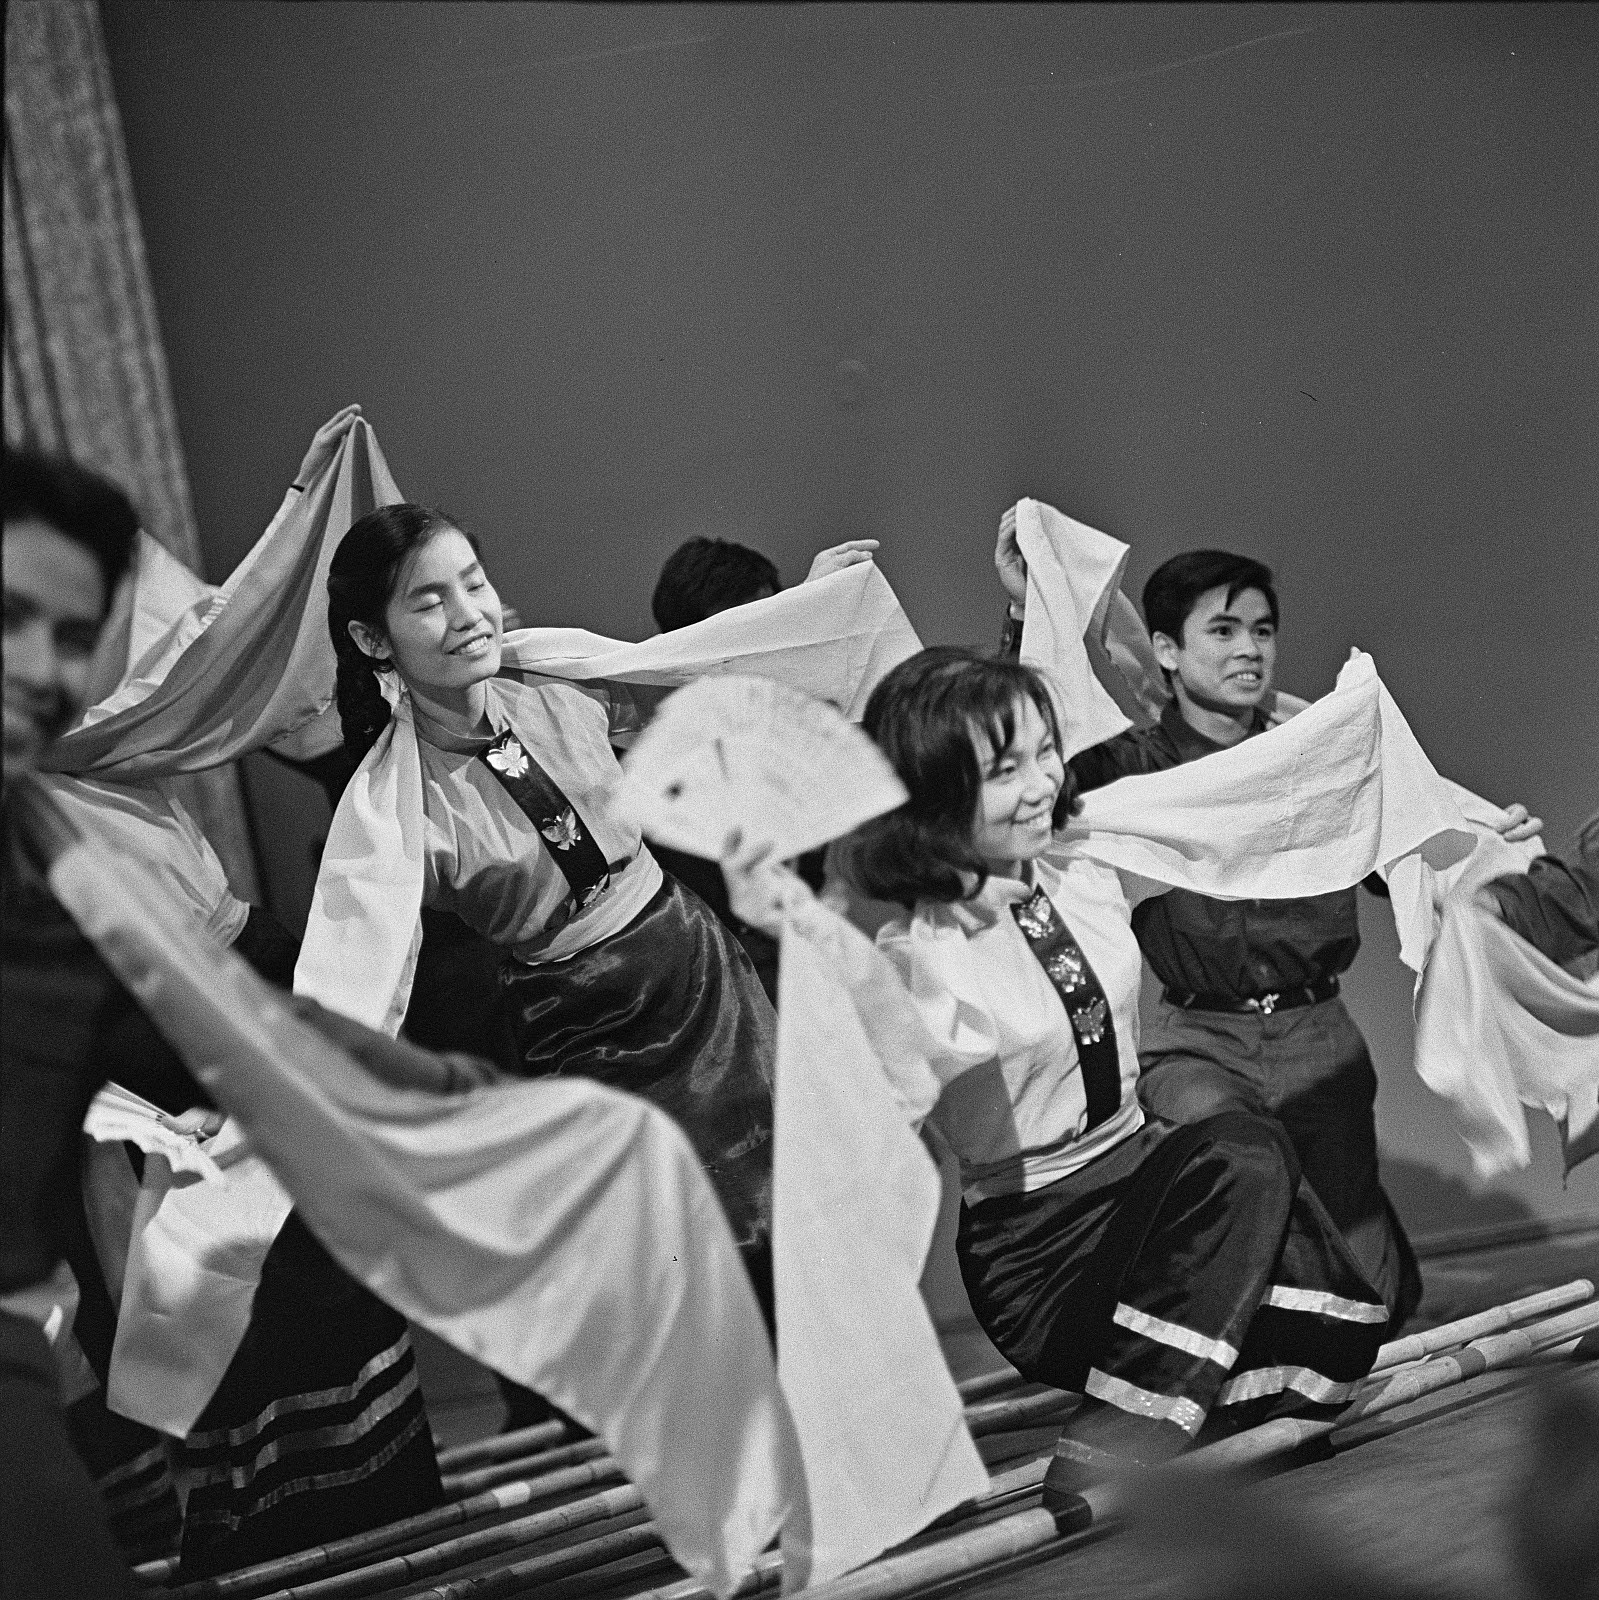
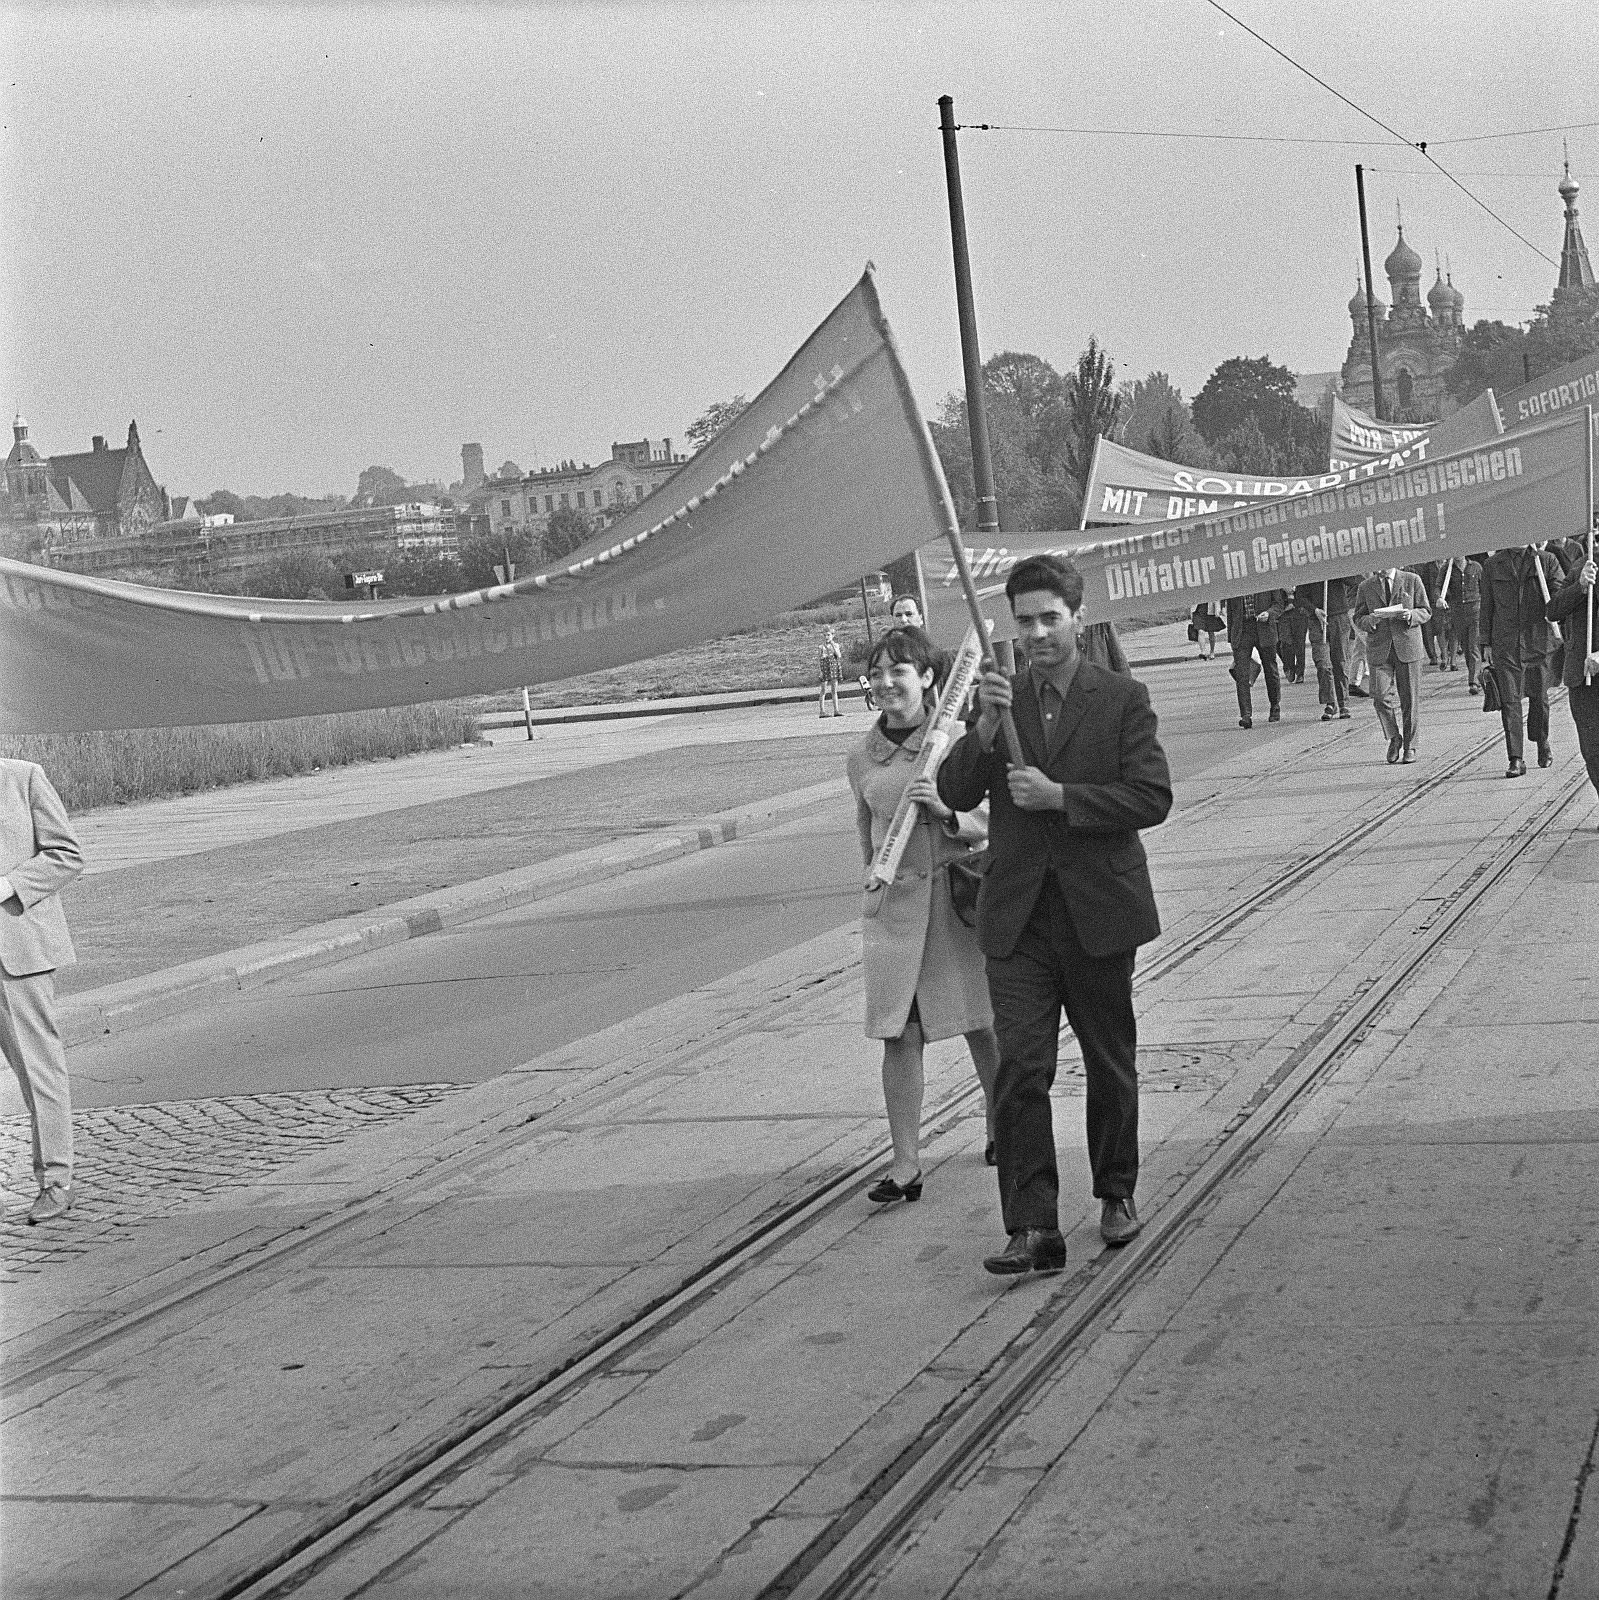
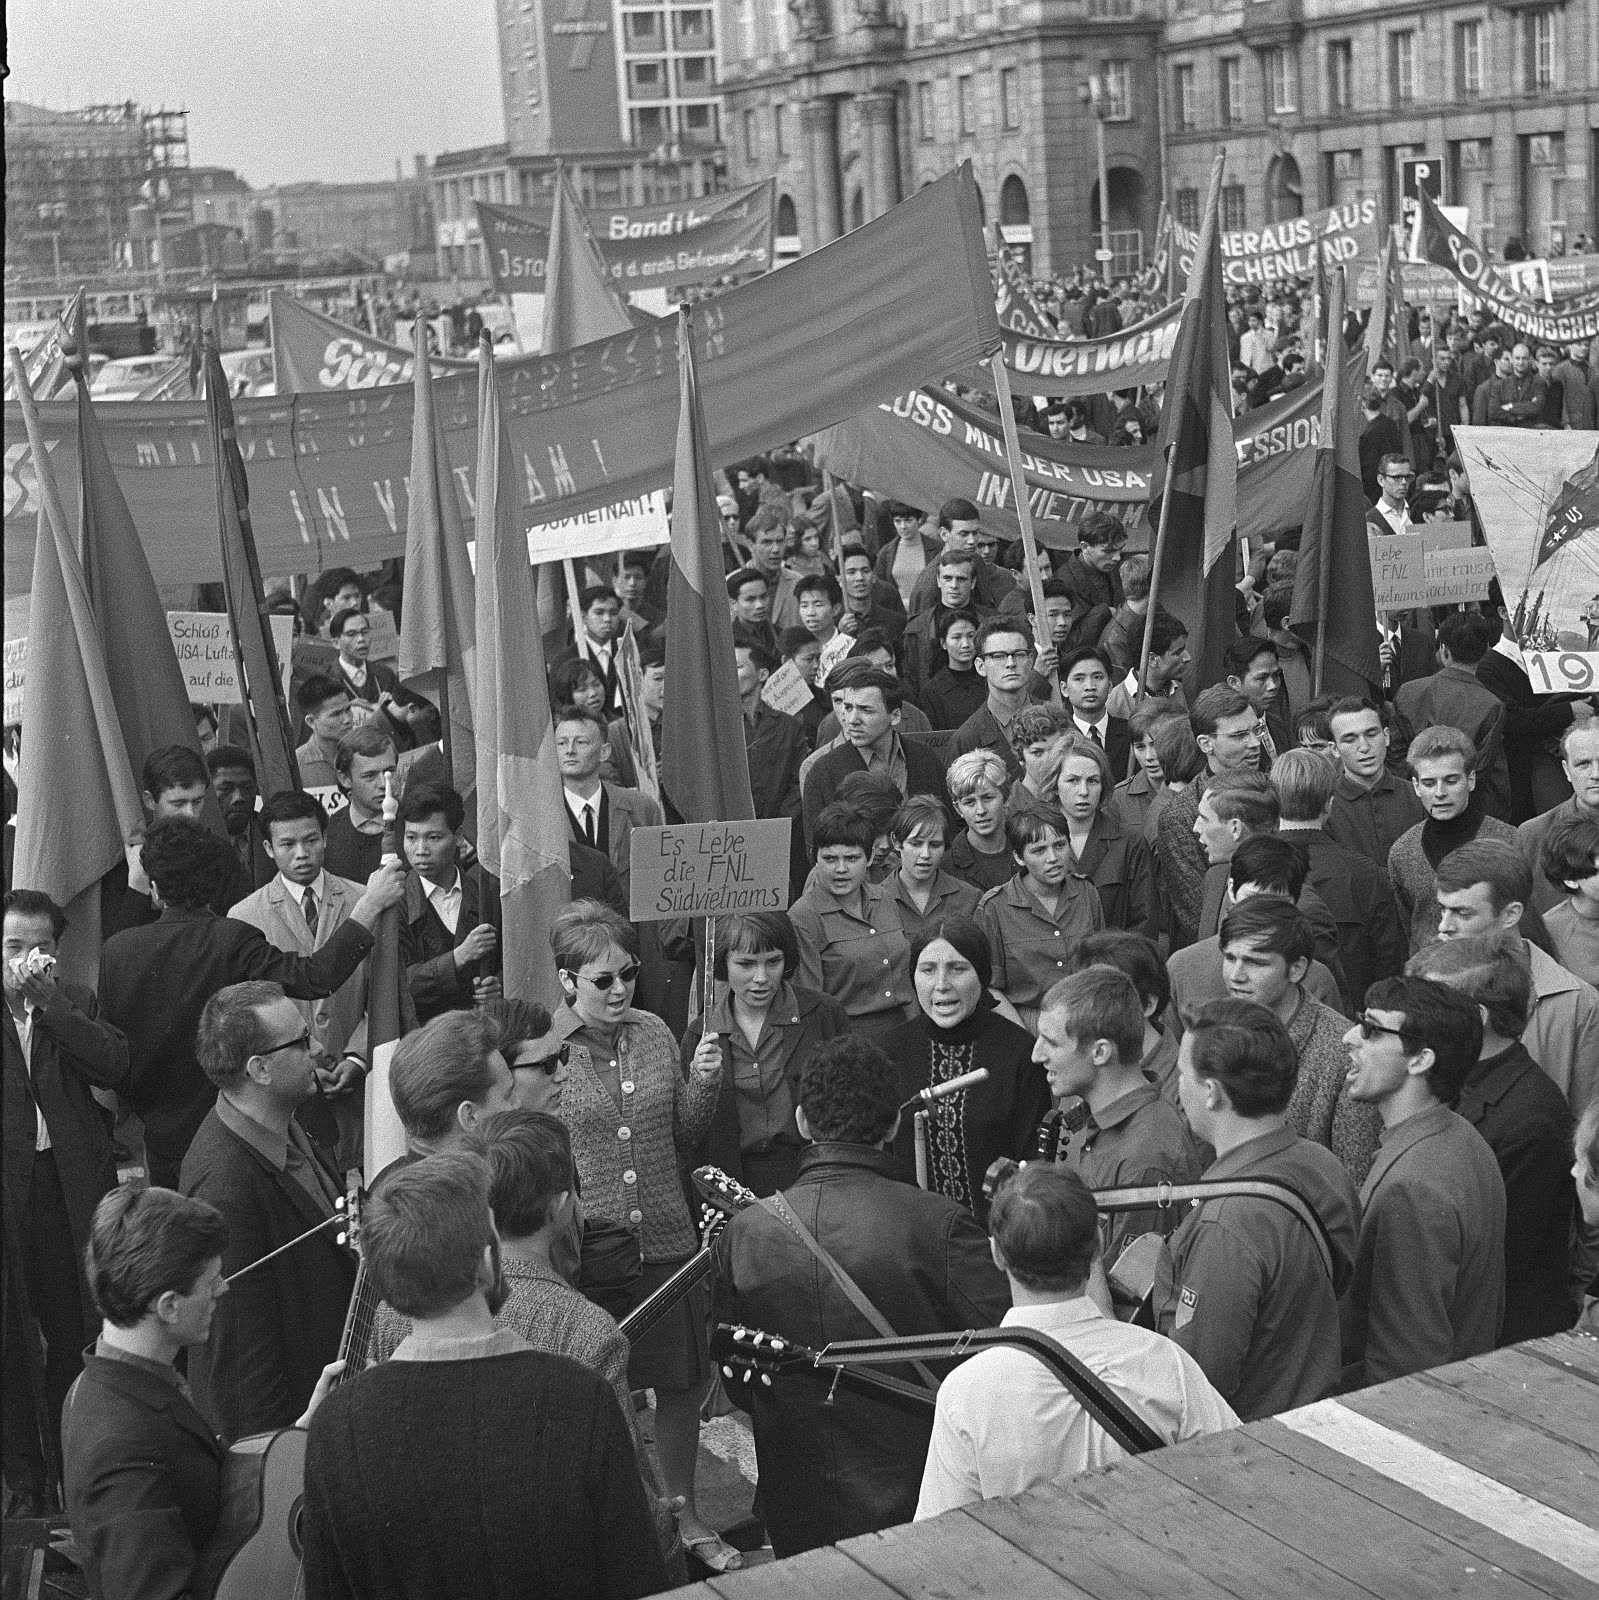
Each group would have time to inspect their assigned photograph carefully and respond to a set of discussion questions such as:
- What does this photo suggest about the nature of the protest rally?
- What does it suggest about the size or scale of the protest?
- What does it suggest about who took part in this protest?
- What conclusions might we draw about this response to the Vietnam War from the photograph?
Using the ‘jigsaw’ method, students are then divided up and reassigned to new groups in which there is a representative of each photograph present. This will work best if each individual student is given a copy of the photograph to bring with them to the new group.
These new groups provide students with a much broader sense of the event than provided by one photograph only. In the new groups, students can share their initial impressions from their own photographs and then be prompted to discuss new points such as:
- How does looking at the other photographs change your initial impressions of this protest?
- Now, how would you respond to the key questions:
- What does this photo suggest about the nature of the protest rally?
- What does it suggest about the size or scale of the protest?
- What does it suggest about who took part in this protest?
- What conclusions might we draw about this response to the Vietnam War from the photograph?
- What does this activity suggest about the value and limitations of photographs as historical sources?
This activity could be easily adapted to any historical event for which we have a collection of photographs that might individually provide quite different vantage points or lead students to quite different conclusions.
2. Photographs for Different Purposes
To help students appreciate the way in which photographs can be staged and selected in order to meet different objectives, you might set them a more creative kind of task. On Historiana, you can find a version of this activity as an eLearning Activity about Kaiser Wilhelm during WWI here. This is an easily adaptable activity model that can be applied to a variety of topics by following these main steps:
- Develop a scenario in which students will need to select one or two photographs from a variety of options to share with a particular audience. For example: to publish in a newspaper, to include in a recruitment flyer, to include in a textbook for students, or to hang on the wall of an official building.
- Provide students with a selection of different photographs and prompting questions to support their thinking about which photograph(s) will best convey the image required in the scenario.
- Once selected, students should justify their reasoning either verbally or in writing. They should, especially, provide reasons why their selection was better than the other options available.
- Conclude with a reflective discussion or writing task in which students must consider what this activity suggests about photographs as historical sources. Do they always provide an objective insight into the past?
3. Compare and Contrast (Spot the Difference?)
In order to highlight the ways in which historical photographs can also be manipulated, a simple activity like ‘spot the difference’ or ‘compare and contrast’ between two images can be very helpful. Historiana’s eActivity builder provides an easy online option to have students highlight and label similarities and differences between images. The online format is helpful as it allows annotations that do not block features of the image; though versions of these activities could equally be completed offline.
A compare and contrast activity like this could be used with photographs that have been deliberately edited or changed. For instance, there are a range of well-known photographs from the Stalinist era from which Trotsky and other leaders who had fallen out of favour were removed from images.
This activity, however, can also be applied to photographs that have been staged rather than edited. Students might, for example, receive an official and an unofficial photograph in order to highlight how staging might occur and be detectable. Students could be provided with an official WWI photograph from the Historiana source collection The Visual Front and then an unofficial image such as those taken by George Hackney.
In each case, this comparison activity can be followed by further analysis of the causes and effects of the manipulation. Students might address questions such as:
- How can we know if a photograph has been manipulated?
- Why might this photograph have been manipulated in this way? What is its purpose?
- How was the photograph manipulated? What exactly was edited or staged?
- Does a deliberately manipulated photograph give different impressions or insights in comparison to others?
- Can a manipulated photograph still be a useful historical source?
Concluding Thoughts
These activities will hopefully form a helpful starting point for thinking about how to incorporate historical photographs into your lessons. There are, of course, many other ways in which you might meaningfully weave photographs as historical sources into your practice. What is most important, however, is that we strive to ensure students are engaging critically with photographs as sources. Our teaching should aim to make sure the students are thinking deeply about:
- what evidence photographs do – and do not – provide
- how to look closely in order to draw out details and insights about the past; and
- how completely or objectively photographs are able to provide a ‘window to the past’.
This article links to the start of a new initiative between EuroClio and Europeana which aims to promote digital cultural collections in school classrooms through collaboration and co-creation between cultural heritage institutions and teachers.